You are able to integrate additional applications, such as MailChimp, Zillow, etc. or other systems with Fieldnotes. We offer Zapier as a great way to integrate to Fieldnotes. Zapier allows two different programs that don't normally talk to each other to send information to or from each other. Think of it like this. If you were trying to connect one different system to another. What Zapier does is take your information from one system and makes sure that it connects to the other system. Et voila! It now talks to each other!
By and large, the Fieldnotes Ai already has many options for managing your leads in the database. But, for those situations where it's not readily apparent how you would get that information into Fieldnotes Ai automatically as a new lead, Zapier may be the answer. It really depends where your leads come from that will determine if you really need to use Zapier. Our recommendation is to learn all of the Fieldnotes basics of lead generation, and then using those basic tools start getting all of your existing leads flowing into the system. At some point, you may discover there really is no option to get your leads from a particular program where they are stored over to Fieldnotes. But, if that program is integrated into Zapier, then you definitely can!
Setting up Zapier with your Fieldnotes Ai Account
Step 1: Get the Fieldnotes Ai zap link.
Right here: https://zapier.com/developer/public-invite/34016/5bc32a06cb12cb110f1512fef9272098/
Clicking this link will prompt you to either log into your existing Zapier account, or create a new one. In either case, proceed as you would, and you should land on a "My First Zap With Fieldnotes Ai" page. Because the link is an invite, it assumes you want to create a zap right away.
Creating Zaps For New Leads
- Am I sending leads FROM somewhere TO Fieldnotes Ai?
- Am I sending leads TO Fieldnotes Ai FROM somewhere else?
Sending Leads FROM Fieldnotes Ai TO somewhere else:
 Although the example zap starts with a trigger from a different program, you can still follow along the same way. The logic doesn't change, and it's actually easier because there is only one trigger to choose from. When starting with Fieldnotes Ai as the trigger app, your only option is to send a lead to another program.
Sending Leads TO Fieldnotes Ai FROM somewhere else:


Example New Lead Zap
Other programs aside from twitter can of course provide you with phone numbers or emails of those leads or contacts you want sent to Fieldnotes Ai.
For example, if you ran a newsletter campaign via a popular blog or landing page through MailChimp, you could add your new subscribers automatically to Fieldnotes Ai. The process is almost exactly the same, apart from the names of some of the options in one program vs. another.
Step 1: Choose Twitter.
Step 2: Choose Trigger
This is showing you that if you need to go back to any step in the future, just click on that step in this left hand navigational tool.
Step 3: Connect Twitter
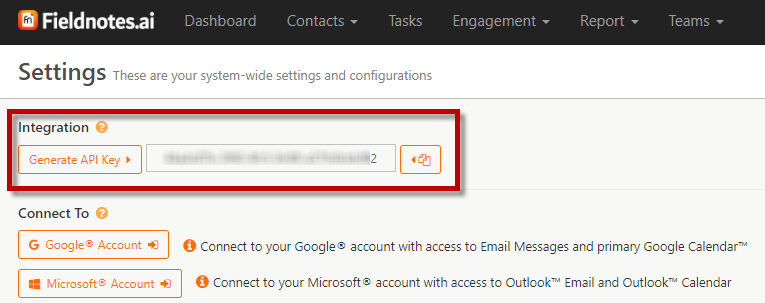
If you started with Fieldnotes Ai as your trigger, you'll need your Zapier API key! It is found in your Setting menu under your Name (Upper Left Corner). Just look for the Generate API Key, and click the copy button to copy it!
Step 4: Choose Action!
Click 'Add A Step' on the left hand side, under the trigger step we just completed.
Then, pick 'Action/Search' which should be first in the list.
Now this should be a little familiar. It's time to pick Fieldnotes Ai as the 'action.'
Simply search for and pick Fieldnotes Ai from the middle of the page.
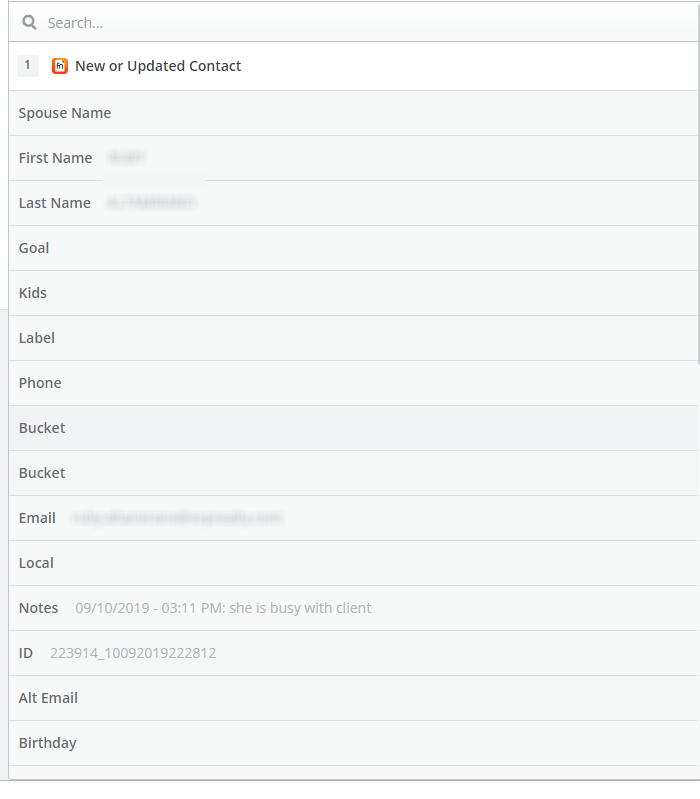
After clicking on Fieldnotes Ai to select it, you will see that your options are create a New Task, New or Updated Task, New or Updated Contact or New Contact.

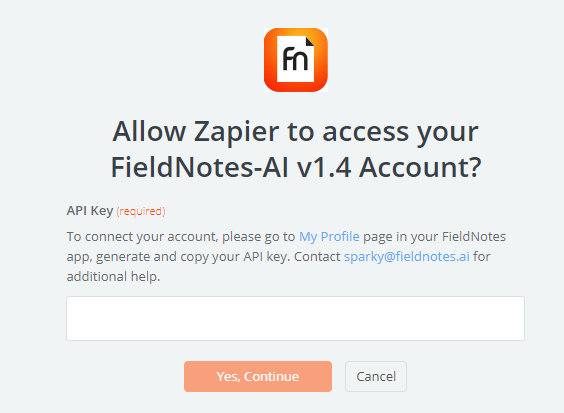
Step 5: Connect Fieldnotes Ai account.

Once your key is copied, paste it in, click continue, and you should be able to test it successfully.
Step 6: Connect Fields
You can see that because this is just an example, I'm fudging things a bit. Looks like at least Twitter provides a "Follower Name" which is what we'll use as the leads' name. I set the type as buyer just because. And for email, there is no email in the twitter data. So, I used the twitter ID, and added @fnleads.com to it just to create a fake email address. This will ensure that all of the leads that are funneled into Fieldnotes Ai have unique contact records.
Here's another example using Google Contacts instead of twitter, so you can see the difference between programs. It all depends on what they can provide via their API to Zapier:

Here I highlighted the data I picked out from Twitter to send as a test lead.

At the bottom, click the blue 'Send Test To Fieldnotes button. If it completes successfully then you'll see a new test lead in your account.
The last step that will display after a successful step (and clicking 'Finish') will be to enable your Zap! That's it!
If you have any questions about this setup, please send an email to support@fieldnotes.ai or reach out to your Customer Success Manager!